Sunday, July 14, 2013

Justin Highland 1990 Honda Civic Hatch w/ CRX front conversion

Justin Highland
23
1990 Honda Civic Hatch w/ CRX front conversion, converted to OBD1
B20b4 bottom end, b16 head blox intake, rc injectors, log manifold, .50 trim t3 turbo, competion clutch stage 4 6puck clutch with prolite flywheel, underdrive crank and alt pulleys, chipped p28, skunk2 exhaust, coilovers, ktuned traction bar, eg half radiator, lots more cant think of it all
Always interested in 4cyl imports out running domestic v8s


Paul's 95 db8 converted rhd


Paul 20 years old currently an active duty Air Force member from Tampa fl I've been into h/a for about 8 years now I've had 17 different h/a I currently drive a 95 db8 converted rhd 
Parts list-


Interior-
S2k front seats
Leathered matching rears                                                                                          
Oem Itr arm rest 
Oem Itr gauge cluster 
Oem Itr shift boot
Oem Itr shift knob
Oem Itr floor mats 
Oem Itr carbon ac vents/ac control
Ken wood in dash navi/radio 


Exterior-
Itr front
Oem db8-r window visors
Rear window visor 
16x9+20 klutch sl1 wheels
Skunk2 front&rear camber kits
Tien monoflex 1pc suspension 
Blox lca's
Asr subframe 
Beaks tie bar
Asr 22mm sway bar 

Motor- 
Poor mans type r 
B16 head with all type r internals
B18c bottom end
Eagle rods
Weisco 10.5:2:1 pistons 
Rmf headers 
Type r intake mani ported 
Omni power throttle body port matched
Greddy evo 2 exhaust 
Aem power chamber cold air intake

Probably alot more I'm forgetting currently deployed so don't have updated pics until I get home next month but this is how she sat before the Itr front,new wheels and other minor accessories 

Wednesday, July 10, 2013

Tyler Burrough's 93 Honda Civic VX h/b


Tyler Burroughs
Age: 28
93 Honda Civic VX h/b
Mods:
LS/VTEC (B16A1 head) CTR cams Titan Motorsports cam gears Skunk2 intake manifold Blox 72mm throttle body Yowei-SS carbon intake DC Sports 4-1 header custom 2-1/4" exhaust DC Sports muffler NGK blue wires Mishimoto radiator hoses mild engine bay wire tuck under hood fuse box moved to cabin
Ground Control coilovers Tokico Illuminastruts Skunk2 front camber kit Energy Suspension bushings Blox rear lower control arms
EP3 Civic Si seats Razo 440R weighted shift knob PWJDM shift boot led white / amber dash lights Alpineheadunit Infinity Kappa front door speakers Kenwood slim kevlar12" sub Rockford Fosgate 300-1 amp Viper 5901 remote start/alarm secondary mini piezo siren in dash rear hatch pop from keypad
EX/Si front lip PPG candy apple red paint all clear tail lamps half clear tail lamps Volk Racing Group AV 16x7 wheels (manufactured in '95) Falken 205/40 tires
How I got into Honda's: I have been into cars my entire life. Around age 7 or 8 I became very interested in low riders. The bright and flashy paint, wheels, the fact that they were hardly off the ground...I just liked how different they were. Around age 10 (1995) a few of my friends had older brothers who began driving and had modified import cars, mainly Honda's as they were cheaper and easier to modify than a traditional low rider. Around 1999 I helped a friend's brother do what was one of our town's first B18C swaps into a 92-95 Civic hatch and after riding in that car every day to and from school, I was hooked. I got my first car, a bone stock (never even had a radio or speakers installed), showroom condition '95 Civic DX coupe. I haven't owned anything but Honda's since. Reasonable dream car: Pop-up headlight Acura NSX A little about me: I have about 6 years body work experience and have done everything on my car myselfwith the exception of an extra pair of hands during the engine swap.It also has: Crower valves, springs & retainers Denji headlamps and a CTR front upper strut bar


Angel De La Torre's 1994 Accord Wagon CE1

Name: Angel De La Torre
Age: 18
Current Ride: 1994 Accord Wagon CE1
Parts/ MODS: motor & suspension all stock, some exterior accessories:
-black housing headlights with HID, amber corner lights
-oem fog lights
-hood bra
-gold emblems
-led tail lights
-side markers
-hoa badges & US wagon emblems
-oem roof rack
-oem cd player
How you got into Honda/ Acura: I don't remember
How long have you been into H/A: I don't remember
Dream Car: I have several H/A dream cars, I'll say some of them:
-Honda accord tourer (Acura TSX sport wagon)
-Honda accord wagon SiR 1997
-Honda accord wagon SiR 2002
-Honda s2000
-Honda NSX
-Honda prelude


Julien Lewie Dittmar's project

                                                                                    My name is Julien Dittmar I'm 24 years old
My current ride is an 01 acura intrgra gsr
Well for mods I have JDM intrgra typr R pistons with compression around 11:0:1 I have the 5 lug type R suspension with the ome USDM type R rims and a 2 1/2 exhaust
I've been into Honda's for 8 years now but never owned one until 4 years ago when I bought my teggy


Norman Thompson Hsc Work in progress.


name: norman age:22 ride:1995 eg 4dr mods:CAI,sped-d cat-back exhaust with a 3A racing pipe for a muffler and soon getting a rare d15b complete block. how i got into HA: added u guys on fb. into hondas/acuras: since i was a kid my older brother loved them and that is all i knew were hondas so i kinda grew up with it. dream car:honda nsx. and im a d series kind of guy pple say its the worst motor ever but all depends on you i prefer them cause i like being the under dog. i have a z6 swap in my eg that recently seized a bearing and now getting a d15b block from japan and plan on building my head and hopefully getting a goal of 180whp n/a thats my goal

Monday, July 8, 2013

Pros and Cons of Back pressure.

Back-pressure: Friend or Foe?
Back-pressure can influence in 2 places. Just at the start of when the exhaust valve opens and at cam overlap.
I. Introduction

One of the most misunderstood concepts in exhaust theory is back-pressure. People love to talk about back-pressure on message boards with no real understanding of what it is and what it's consequences are. I'm sure many of you have heard or read the phrase "Hondas need back-pressure  when discussing exhaust upgrades. That phrase is in fact completely inaccurate and a wholly misguided notion.

II. Some basic exhaust theory

Your exhaust system is designed to evacuate gases from the combustion chamber quickly and efficiently  Exhaust gases are not produced in a smooth stream; exhaust gases originate in pulses. A 4 cylinder motor will have 4 distinct pulses per complete engine cycle, a 6 cylinder has 6 pules and so on. The more pulses that are produced, the more continuous the exhaust flow. Back-pressure can be loosely defined as the resistance to positive flow - in this case, the resistance to positive flow of the exhaust stream.

III. Back-pressure and velocity

Some people operate under the misguided notion that wider pipes are more effective at clearing the combustion chamber than narrower pipes. It's not hard to see how this misconception is appealing - wider pipes have the capability to flow more than narrower pipes. So if they have the ability to flow more, why isn't "wider is better" a good rule of thumb for exhaust upgrading? In a word - VELOCITY. I'm sure that all of you have at one time used a garden hose w/o a spray nozzle on it. If you let the water just run unrestricted out of the house it flows at a rather slow rate. However, if you take your finger and cover part of the opening, the water will flow out at a much much faster rate.

The astute exhaust designer knows that you must balance flow capacity with velocity. You want the exhaust gases to exit the chamber and speed along at the highest velocity possible - you want a FAST exhaust stream. If you have two exhaust pulses of equal volume, one in a 2" pipe and one in a 3" pipe, the pulse in the 2" pipe will be traveling considerably FASTER than the pulse in the 3" pipe. While it is true that the narrower the pipe, the higher the velocity of the exiting gases, you want make sure the pipe is wide enough so that there is as little back-pressure as possible while maintaining suitable exhaust gas velocity. Back-pressure in it's most extreme form can lead to reversion of the exhaust stream - that is to say the exhaust flows backwards, which is not good. The trick is to have a pipe that that is as narrow as possible while having as close to zero back-pressure as possible at the RPM range you want your power band to be located at. Exhaust pipe diameters are best suited to a particular RPM range. A smaller pipe diameter will produce higher exhaust velocities at a lower RPM but create unacceptably high amounts of back-pressure at high rpm. Thus if your power-band is located 2-3000 RPM you'd want a narrower pipe than if your power-band is located at 8-9000RPM.

Many engineers try to work around the RPM specific nature of pipe diameters by using setups that are capable of creating a similar effect as a change in pipe diameter on the fly. The most advanced is Ferrari's which consists of two exhaust paths after the header - at low RPM only one path is open to maintain exhaust velocity, but as RPM climbs and exhaust volume increases, the second path is opened to curb back-pressure - since there is greater exhaust volume there is no loss in flow velocity. BMW and Nissan use a simpler and less effective method - there is a single exhaust path to the muffler; the muffler has two paths; one path is closed at low RPM but both are open at high RPM.

IV. So how did this myth come to be?

I often wonder how the myth "Hondas need back-pressure  came to be. Mostly I believe it is a misunderstanding of what is going on with the exhaust stream as pipe diameters change. For instance, someone with a civic decides he's going to upgrade his exhaust with a 3" diameter piping. Once it's installed the owner notices that he seems to have lost a good bit of power throughout the power-band  He makes the connections in the following manner: "My wider exhaust eliminated all back-pressure but I lost power, therefore the motor must need some back pressure in order to make power." What he did not realize is that he killed off all his flow velocity by using such a ridiculously wide pipe. It would have been possible for him to achieve close to zero back-pressure with a much narrower pipe - in that way he would not have lost all his flow velocity.

V. So why is exhaust velocity so important?

The faster an exhaust pulse moves, the better it can scavenge out all of the spent gasses during valve overlap. The guiding principles of exhaust pulse scavenging are a bit beyond the scope of this doc but the general idea is a fast moving pulse creates a low pressure area behind it. This low pressure area acts as a vacuum and draws along the air behind it. A similar example would be a vehicle traveling at a high rate of speed on a dusty road. There is a low pressure area immediately behind the moving vehicle - dust particles get sucked into this low pressure area causing it to collect on the back of the vehicle. This effect is most noticeable on vans and hatchbacks which tend to create large trailing low pressure areas - giving rise to the numerous "wash me please" messages written in the thickly collected dust on the rear door(s).

VI. Conclusion.

SO it turns out that Hondas don't need back-pressure  they need as high a flow velocity as possible with as little back-pressure as possible.

Turbo Exhaust Systems:

Some of you asked for a better explanation about restriction in a turbo exhaust, so here 'goes. To sum it all up, on a turbo car, the tighter and more restricted the exhaust housing of the turbo is, the faster you're going to spool your turbo... because the restricted gasses escape through the exhaust housing with more velocity (much like the garden hose description quoted above)... but with this restriction comes the downside. Less exhaust volume will be able to fit through that turbine housing once the turbo is spooled and starts squishing more air through the intake.

This is where the waste-gate comes into play. The waste-gate is actuated BEFORE the exhaust wheel in the exhaust housing. When it opens, whatever the diameter of your waste-gate is gets added to your exhaust piping. Effectively increasing the capacity of the exhaust provided that everything downstream is large enough in diameter to handle it the extra flow. The main reason it does this is to prevent over-spooling the turbo. Once the turbo reaches its efficiency, it doesn't need to flow all the extra gasses through the turbine wheel, so the waste-gate allows you to route the exhaust around the turbo... if it can't route enough exhaust around the turbo (restricted waste-gate  then too much exhaust gas will be forced by the exhaust wheel and BOOST CREEP will occur as your turbo over-spools.

One way to prevent boost creep is to port the waste-gate housing (if you have an internally gated turbo) or to replace the waste-gate with a bigger unit. If that still doesn't work, then the problem is likely going to be a restriction in the exhaust downstream from the waste-gate  Many over-boosted car owners prefer to vent their waste-gate dumps to the atmosphere. Not only is it illegal to bypass your catalytic converter, but it's loud as hell, gets your engine bay filthy, and clogs up your K&N like nobody's business; however, it nearly eliminates boost creep. It's a cheap and easy solution that fixes boost creep on a race car.

The best solution to boost creep is to route your waste-gate dump past the catalytic converter and Back into the exhaust. It will be a custom setup. Nobody makes this. Make it look clean and you'll pass emissions because they don't run your car hard enough to open the waste-gate when doing emissions testing. You have to reach full boost for the waste-gate to open, and since the exhaust runs through the cat until the waste-gate opens, it all gets "cleaned" before it reaches the sniffer. With this setup, the waste-gate will also be much quieter because it still runs through the muffler, and you won't trash your engine bay with black caustic funk.

Putting a separate catalytic converter on your waste-gate dump is a stupid idea because you'll never get it hot enough to "light off" and start converting the carbon monoxide... so don't get any crazy ideas and create unnecessary exhaust restrictions.

Once compressed air comes into the mix with an engine, exhaust tuning has much less to do with making power. So what if you can milk another 3-5 hp out of a car with a tuned exhaust... the benefits of making an engine sustain an insane final compression ratio (boosted air x compression in the combustion chamber) has much more affect on making power if you can just get rid of the extra gasses it produces. Bigger is almost always better on a turbo setup. The only place where it isn't good is on the exhaust wheel where too big can = no chance of spooling your over-sized turbo any time this year.

Tuesday, January 1, 2013

How to Replace a wheel bearing on a Acura Integra


                                                             Things You'll Need
                                                                   Lug wrench
                                                                        Jack
                                                                Socket wrench
                                                              Metric socket set
                                                             Ball joint remover
                                                               Bearing remover
                                                                  Bearing press
                                                                Plastic hammer
                                                                Torque wrench
                                                                   breaker bar
Instructions
1 Loosen the lug nuts. Raise the vehicle with a jack and remove the wheel. The jack point is a thicker, reinforced edge at the bottom of the body panel directly behind the
 front wheel.

2 Remove the bolts from the brake caliper and hang the caliper from a length of scrap wire. Do not allow it to hang from the brake line.

3 Remove the disc by unscrewing the retaining screws and driving a pair of 8mm bolts through the disc, pushing it away from the hub.

4 Remove the anti lock brake sensor and wire bracket from the steering knuckle.


 5 Remove the upper and lower ball joints.

6 Pull the steering knuckle outward. Disconnect the drive shaft joint with a plastic hammer to fully remove the knuckle.

7 Remove the circular clip that holds the bearing in place. Push the bearing out of the steering knuckle. Remove the inner race with a bearing remover tool.

8 Press the replacement bearing and track into the knuckle with a bearing press. Install the clip. Reinstall the steering knuckle, attach the wheel and lower the vehicle.

How to Moon cut your valve cover

Tools needed:
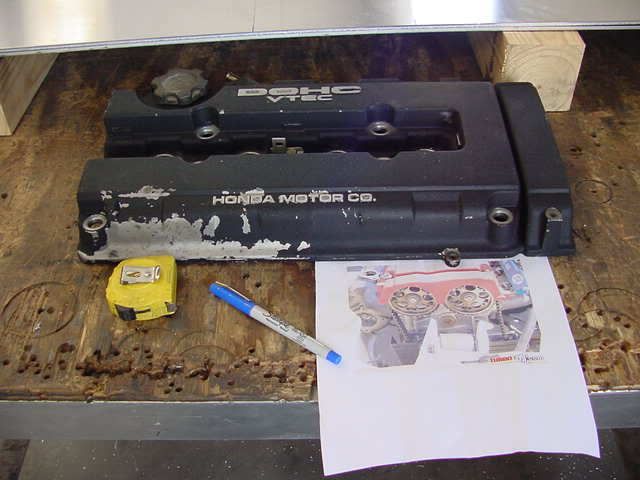
Valve Cover
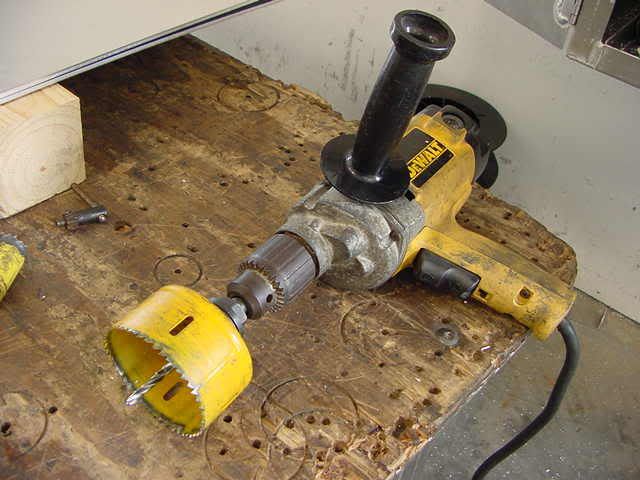
Drill
1/8 bit
3 1/2" hole saw& bit;----- Seems to be the perfect size  
Pilot bit holder thingy (don't know the exact name, sorry)
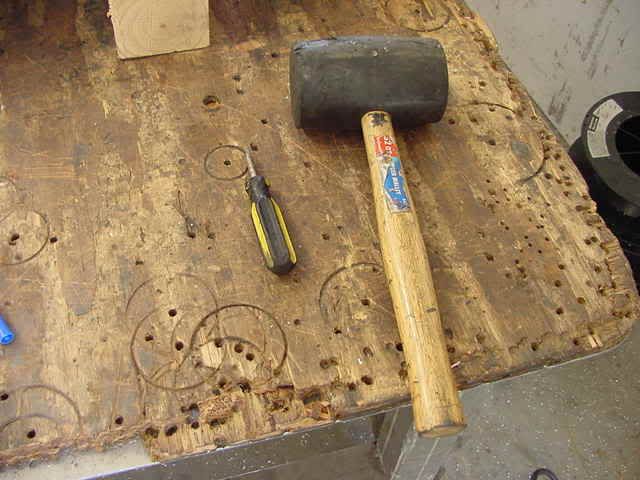
Hammer
Punch (or Phillips screw driver)
A buddy (or a vice)
Optional: A file to smooth down the edges.


Step 1: Locate your valve cover, remove it and get your tools ready to modify your valve cover!!!


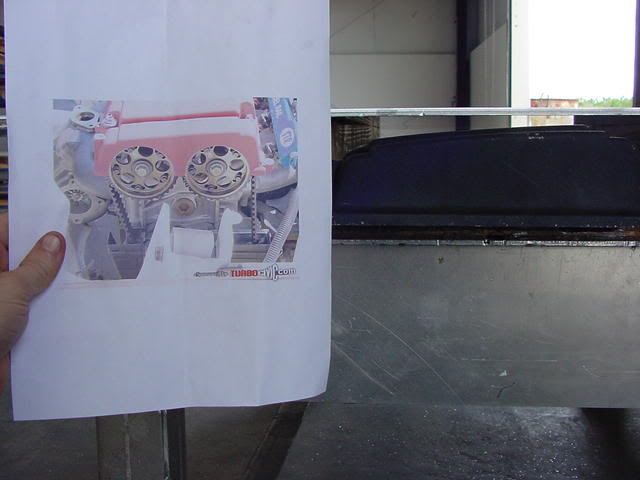
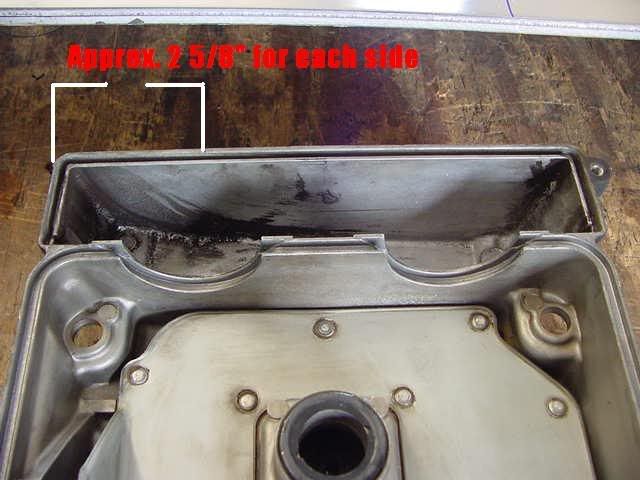
What your starting out with. I used the pic as a size reference for the cam gears.

Step 2: Measure to find the center of the cams. To the center of the lil slot, it's 2 5/8", approx. May be a 1/16th off or so.


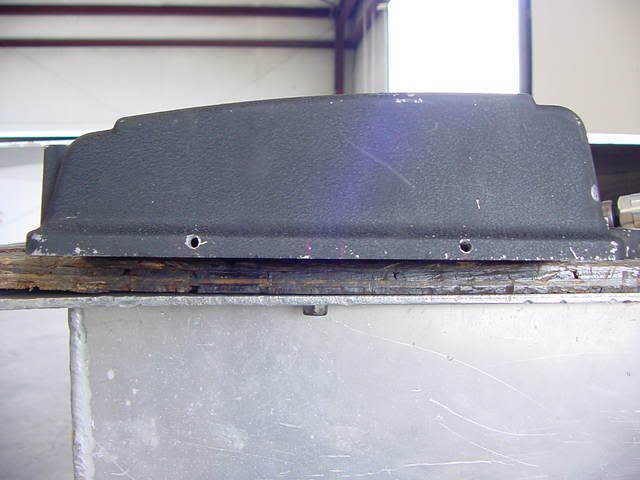
Step 3: Indent the valve cover where your going to drill, and drill a pilot hole. I made my indentions, using the hammer and a punch, about at the top of the lil ridge on the valve cover. Reference t3h pic plz.


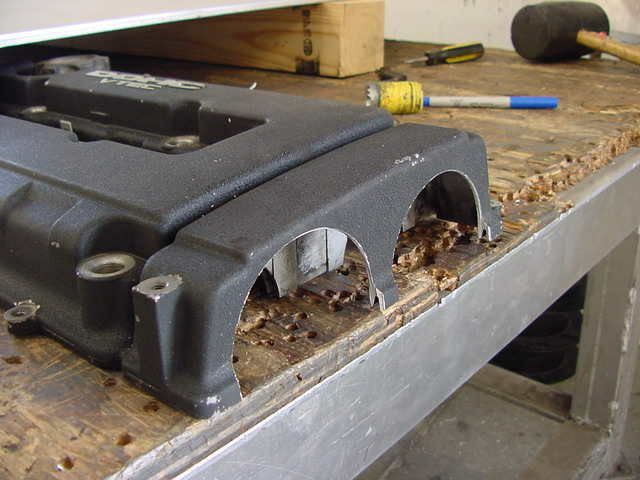
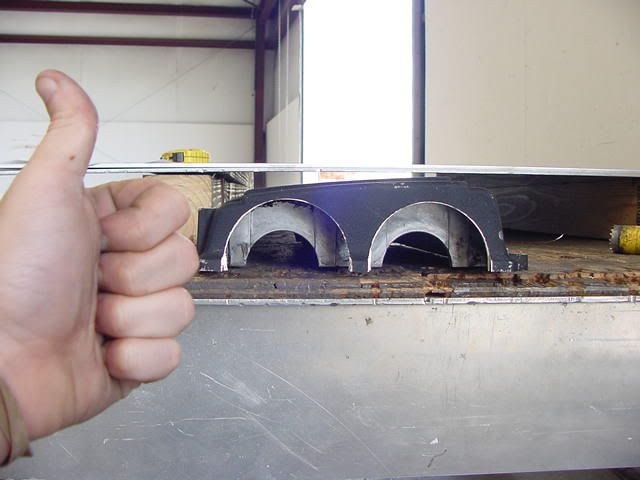
Step 4: Put the hole saw on the drill w/the pilot bit. Using a buddy or a vice (I used my good friend Dan) secure the valve cover so it won't move, muster up some courage and start cutting the valve cover. Maybe you'll end up with something like this.

You know I gotta throw a thumbs up in there 


Step 5: Optional: Using a file, file down the Sharpe edges till they are smooth. Don't want to possibly knick your timing belt when you re-install your valve cover. This may keep you from possibly cutting yourself too
Step 5 (or Step 6 if optional step is used): Clean the valve cover. Don't want any bits of metal in your engine do you? I didn't think so. Clean it as best as you can.